No-Mold Dark Chocolate Cream Horns: The Ingenious Ice Cream Cone Hack
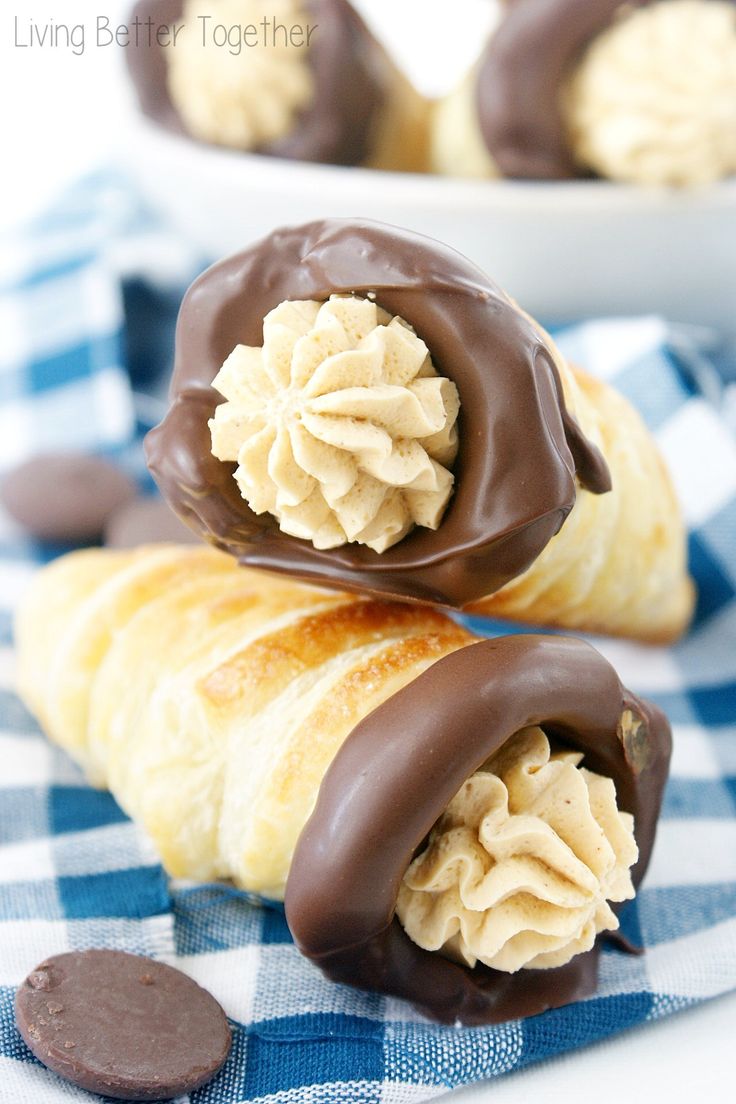
Imagine a dessert that looks like it stepped out of a high-end patisserie, yet is surprisingly simple to create in your own kitchen. We're talking about Dark Chocolate Cream Horns – those ethereal, crispy pastry cones bursting with rich Chantilly cream and decadent dark chocolate. They are the ultimate showstopper, promising a symphony of textures and flavors in every bite: crisp, buttery puff pastry, light-as-air cream, and the sophisticated bitterness of dark chocolate.
For many home bakers, the thought of making cream horns conjures images of specialized equipment – expensive metal molds that take up precious cupboard space. But what if we told you there’s an ingenious, "no-mold" hack that makes these beauties incredibly accessible? Prepare to be amazed as we unveil the secret: ordinary ice cream cones!
Yes, you read that right. Humble sugar ice cream cones, transformed with a simple non-stick foil wrap, become the perfect, disposable, and easily removable forms for your delicate pastry. This brilliant trick eliminates the need for fancy gear, making these luxurious Double Chocolate Cream Horns a reality for anyone with a sweet tooth and a passion for baking.
The Ice Cream Cone Revolution: Your Secret to Perfect Cream Horns
The innovation of using ice cream cones as baking molds is a game-changer for homemade cream horns. Not only does it save you the expense and storage hassle of traditional metal molds, but it also offers a practical, fuss-free approach to achieving that iconic conical shape. Here’s why this method is revolutionary:
- Accessibility & Cost-Effectiveness: Ice cream cones are readily available in any grocery store and are far more affordable than specialized baking equipment.
- Effortless Release: When wrapped correctly with non-stick foil, the pastry slides off the cone post-baking with remarkable ease, minimizing the risk of breakage – a common frustration with reusable molds.
- Perfect Shape: Sugar cones naturally taper to a point, providing the ideal structure for uniformly shaped cream horns.
- No Sticking, No Stress: The non-stick foil ensures your delicate puff pastry bakes beautifully without adhering, guaranteeing a clean, intact horn every time.
The key to this hack lies in proper preparation. Each cone must be tightly wrapped in non-stick aluminum foil, ensuring complete coverage. Smooth out any wrinkles and tuck any excess foil neatly into the cone's cavity. This creates a sturdy, non-stick surface that your puff pastry will adore.
Crafting Your Flaky Masterpiece: Step-by-Step Instructions
Making dark chocolate cream horns might look intricate, but with this guide, you'll find the process incredibly rewarding. The total prep and cook time is around 55 minutes, yielding 6 exquisite horns, each a decadent 684 kcal of pure bliss.
Gather Your Ingredients & Tools:
Tools Needed:
- 6 sugar ice cream cones
- Non-stick foil wrap
- Baking sheet
- Piping bag with a small round tip (or simply snip the end)
- Cooling rack
- Floured work surface and rolling pin
For the Horns:
- 1 sheet (approximately 14 oz / 400g) frozen puff pastry, thawed (all-butter pastry yields superior flavor)
- 1 large egg
- 2 tablespoons water (for egg wash)
- Granulated sugar (for sprinkling)
For the Dark Chocolate:
- 6 ounces high-quality dark chocolate (70% cocoa solids or higher for a rich flavor)
- 3 tablespoons unsalted butter
- 2 tablespoons golden syrup or corn syrup (adds gloss and prevents seizing)
For the Chantilly Cream:
- 1¼ cups cold heavy whipping cream (at least 36% milk fat)
- 6-8 tablespoons powdered sugar (to taste)
- 1 teaspoon pure vanilla extract
- 1 tablespoon skimmed milk powder (optional, helps stabilize the cream)
The Baking Process:
- Prepare Your "Molds": Tightly wrap each sugar ice cream cone completely with non-stick aluminum foil, ensuring a smooth, secure surface. Tuck any excess foil into the cone's opening. Set aside.
- The Egg Wash: In a small bowl, whisk the egg with 2 tablespoons of water until well combined. This will give your pastry a beautiful golden sheen.
- Puff Pastry Preparation: Lightly flour your work surface and roll out the thawed puff pastry sheet to a rectangle approximately 12 x 18 inches and about ⅛ inch thick. Use a sharp knife or pizza cutter to trim the edges for neatness. Slice the pastry along its length into 15 equal strips, each about 1 inch wide and 15 inches long. Cut 3 of these strips in half to create shorter pieces for decorative edges.
- Wrap the Horns: Take one long pastry strip and begin wrapping it around the foil-covered cone, starting at the point. Overlap each twist of pastry by about one-third as you work your way up the cone, ensuring a seamless, continuous spiral. Avoid tucking any excess pastry into the cone opening, as this can make removal difficult later. If you have extra pastry at the top, simply snip it off.
- Decorative Edge (Optional): Gently twist one of the shorter pastry strips and carefully wrap it around the top edge of the pastry-covered cone. This adds an elegant finish. Trim any excess.
- Egg Wash & Sugar: Sparingly brush the assembled pastry horns with the egg wash, then sprinkle lightly with granulated sugar for a lovely crunch and shine.
- Chill & Bake: Arrange the pastry cones on a baking sheet, placing any "messy" ends face down to secure them. Chill in the refrigerator for about 15 minutes while your oven preheats to 400°F (200°C). Bake for 20-25 minutes, or until the pastry is puffed, golden brown, and delightfully crisp.
- Cool & Release: Carefully remove the baked horns from the oven. While still warm but cool enough to handle, gently twist and slide the foil-wrapped cones out of the pastry shells. Place the hollow pastry horns on a cooling rack to cool completely.
The Decadent Double Dark Chocolate & Cream Filling
This recipe ensures a double dose of chocolate, making these more than just cream horns – they're dark chocolate cream horns through and through!
- Melt the Dark Chocolate: In a heatproof bowl set over a saucepan of simmering water (a bain-marie), or carefully in the microwave in 30-second intervals, melt the dark chocolate with the butter and golden/corn syrup, stirring until smooth and glossy. For more detailed guidance, see my guide on How to Melt Chocolate.
- Internal Chocolate Coating: Once the pastry horns are cool, spread about a tablespoon of the melted dark chocolate into the inside of each horn. Swirl it around to coat the interior evenly, then place them back on the cooling rack, opening side down, to allow the chocolate to set. This step is crucial for that satisfying chocolate surprise in every bite!
- Prepare the Chantilly Cream: In a large, chilled bowl, combine the cold heavy whipping cream, powdered sugar, vanilla extract, and skimmed milk powder (if using). Beat with an electric mixer on medium-high speed until stiff peaks form. Be careful not to overbeat, or the cream will become grainy.
- Fill and Decorate: Transfer the Chantilly cream to a piping bag fitted with your desired tip (or simply snip a small hole at the end). Pipe the cream generously into each chocolate-lined horn.
- Final Chocolate Drizzle: Use a piping bag with a small snip, or a spoon, to drizzle the remaining melted dark chocolate decoratively over the top of the filled cream horns.
- Set and Serve: Allow the chocolate to set slightly on a cooling rack before serving. These dark chocolate cream horns are best enjoyed fresh!
Tips for Cream Horn Perfection
- Quality Ingredients Matter: Using an all-butter puff pastry will significantly enhance the flavor and flakiness of your horns. High-quality dark chocolate is also essential for a truly decadent experience.
- Keep Pastry Cold: Puff pastry is easier to work with when cold. If it becomes too warm and sticky, pop it back in the fridge for 10-15 minutes.
- Don't Overlap Too Much: While overlapping is important, overlapping by more than one-third can lead to overly thick sections of pastry that don't bake evenly.
- Chill Before Baking: Chilling the assembled horns for 15 minutes before baking helps the butter in the puff pastry firm up, leading to a flakier texture and preventing excessive shrinkage.
- Serve Fresh: Cream horns are at their absolute best when served shortly after filling, as the pastry can soften over time. If you need to prepare ahead, bake the horns and melt the chocolate, then store separately. Fill and drizzle just before serving.
- Personalize Your Filling: While Chantilly cream and dark chocolate are a match made in heaven, feel free to experiment! Custard, lemon curd, or even a fruit purée could make delicious alternative fillings.
Conclusion
From a simple sheet of puff pastry and a few sugar ice cream cones, you can create a dessert that is not only visually stunning but also exquisitely delicious. These No-Mold Dark Chocolate Cream Horns are a testament to the fact that impressive baking doesn't require a professional kitchen or specialized tools. The joy on your loved ones' faces, the "happy dance" inspired by that first bite – these are the real rewards of baking these beauties. So go ahead, embrace the ice cream cone hack, and elevate your dessert game to a whole new level. You'll be amazed at how easy it is to bring this showstopping treat to your own table!
